Setup instruction for sera Hardscape Rio Negro
A natural and authentic South American landscape is being created with this Hardscape, themed after the over 2.200 km (1367 miles) long Rio Negro river. Matches the sera AquaTank with 160 liters (42 US gal.).
The package includes the following items:
- 1 x sera Scaper Wood L
- 2 x sera Scaper Wood XL
- 1 x sera floredepot 2.4 kg (5.3 lb.)
- 1 x sera floredepot 4.7 kg (10.4 lb.)
- 1 x sera Gravel Brown 20 l
These products allow creating an impressive and varied landscape in only four steps:
1. Add nutrient soil
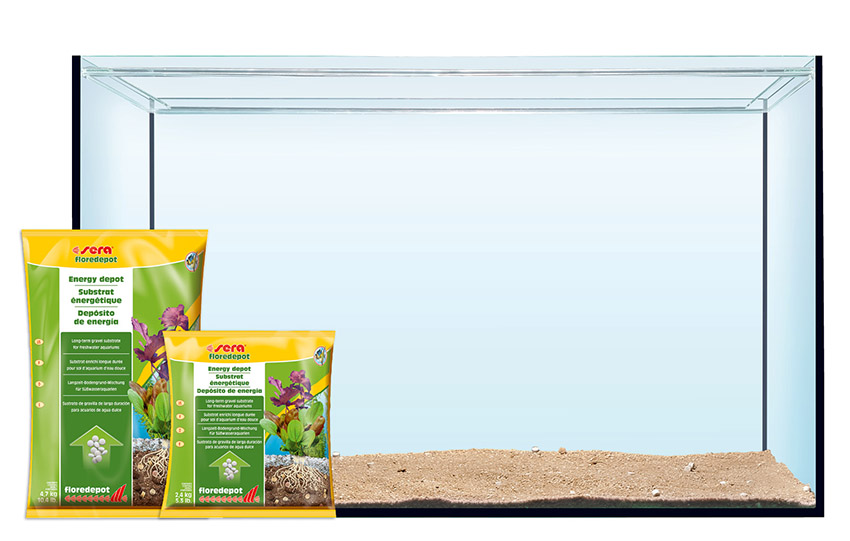
The sera floredepot nutrient soil is the basis for optimal plant growth and must not be missing in the Rio Negro hardscape. It is distributed in a layer approximately 2 – 3 cm (0.8 – 1.2 in.) thick in the entire aquarium. For not disturbing the final appearance of the underwater landscape, we recommend hiding the nutrient soil behind the ornamental bottom ground along the aquarium glass.
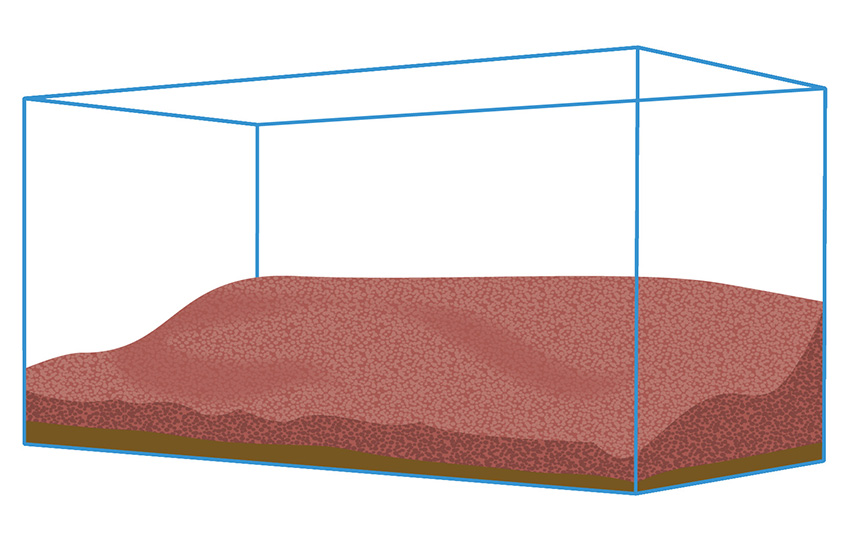
2. Add ornamental bottom ground
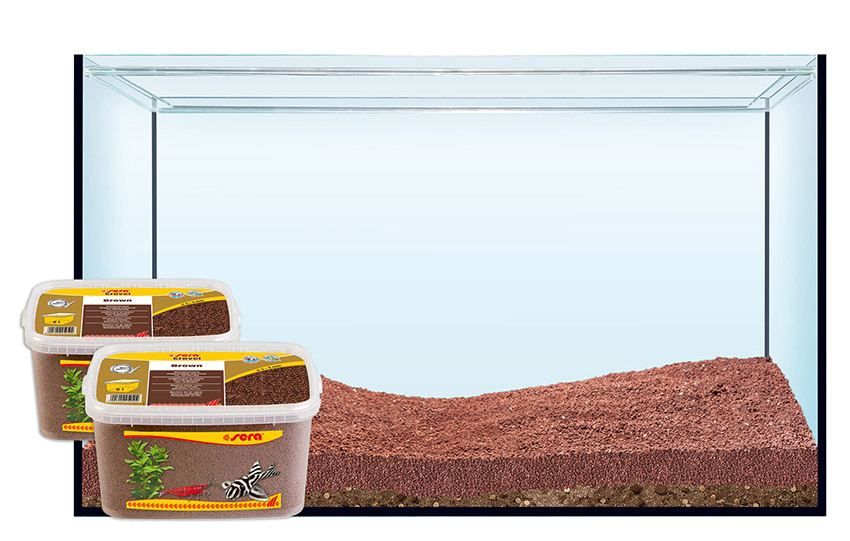
For the Rio Negro hardscape, sera Gravel Brown is distributed on top of the nutrient soil. Distribute the gravel in a way that it slightly rises from the front and the center to both back corners. After approximately 2/3 of the gravel have been distributed, the roots along with the shale slabs should be placed (step 3). Afterwards, the remaining gravel can be distributed over the shale slabs and around the roots.
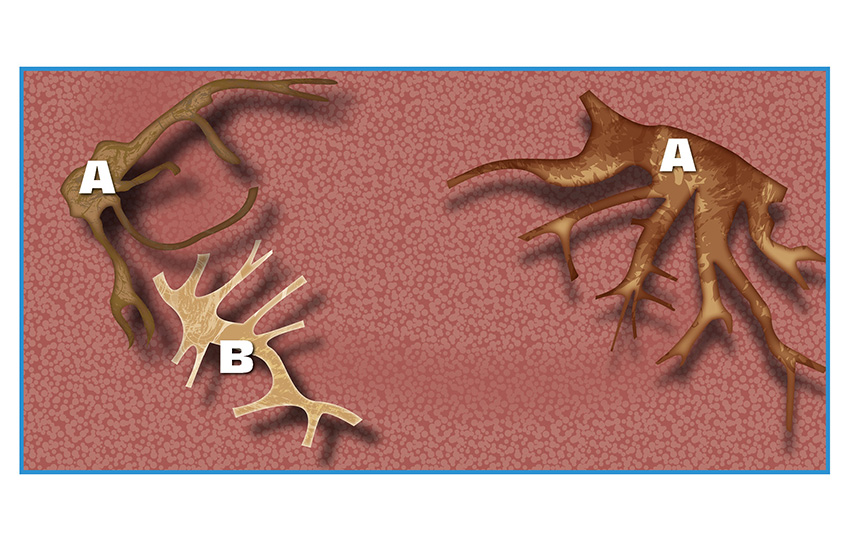
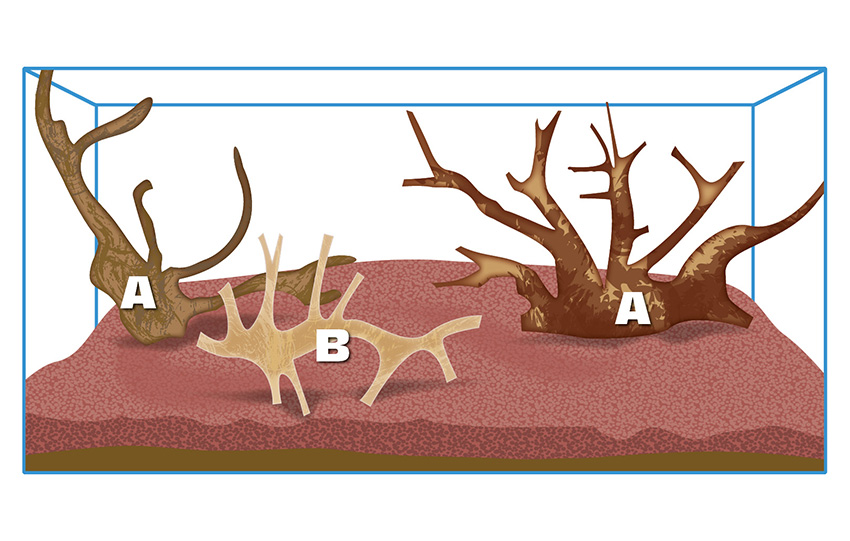
3. Place roots
The two big roots are placed in the gravel in the left and right back. The shale slabs disappear underneath the gravel while doing so. Depending on the shape, they can also be positioned slightly slanted for having the single root tips point to the center of the tank. While inserting them, be sure sufficient space for filter and heater remains in the corners of the aquarium. Afterwards, the third, smaller root is placed in the foreground. The exact position should depend on the actual shape and go along with the left or right big root.
A = sera Scaper Wood XL, B = sera Scaper Wood L
4. Add plants (not included with the kit)
The following plants have been used in this setup example:
1. Helanthium bolivianum
2. Anubias barteri “Compact”
3. Anubias barteri var. nana “Bonsai”
4. Echinodorus parviflorus “Tropica”
5. Ammannia gracilis
6. Lagenandra meeboldii
7. Hygrophila lancea
8. Pogostemon erectus
9. Lobelia cardinalis “Mini”
10. Helanthium tenellum
11. Hydrocotyle tripartita
Most of the plants are planted into the bottom ground according to the planting layout. The species Anubias barteri “Compact” (2.) and Anubias barteri var. nana “Bonsai” (3.) are placed on the roots. They should be attached with suitable glue or with fishing line.
Gently press a hole into the gravel with the fingers, or push it aside, for the bigger plants. Make sure the nutrient soil does not mix with the bottom ground and gets to the surface while doing so. The roots of the plants can be shortened to 2 cm (0.8 in.) if required, e.g. for planting them more easily. In case of smaller plants such as bottom covering plants, we recommend cleaving the plant carefully and without damaging single stems, and to plant them in smaller bushes with some distance to each other. This is best done with tweezers.
We recommend using sera Catappa Leaves and/or sera alder cones for making the biotope appear even more authentic. Besides many positive properties for improving the water quality, the water becomes tinted and thus resembles the black water of Rio Negro. The intensity of the tint is easy to influence by the number of leaves or alder cones.
Tip: Before adding fish, it is worthwhile with new AquaTanks setups to wait until the plants have grown on and cannot be pulled out by the fish anymore.

