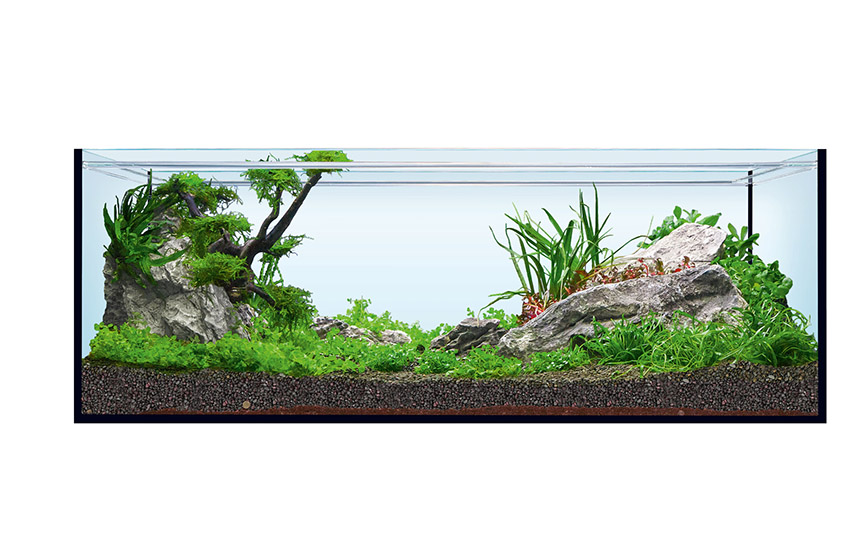
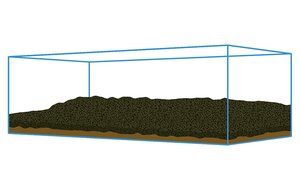
Not only shrimps do well in this hardscape. The XXL version of the “Shrimp” hardscape allows creating a beautiful, natural rock landscape. Matches the sera AquaTank with 96 liters (25 US gal.).
The package includes the following items:
- 6 x sera Rock Gray Mountain S/M
- 3 x sera Rock Gray Mountain L
- 1 x sera Rock Gray Mountain XXL
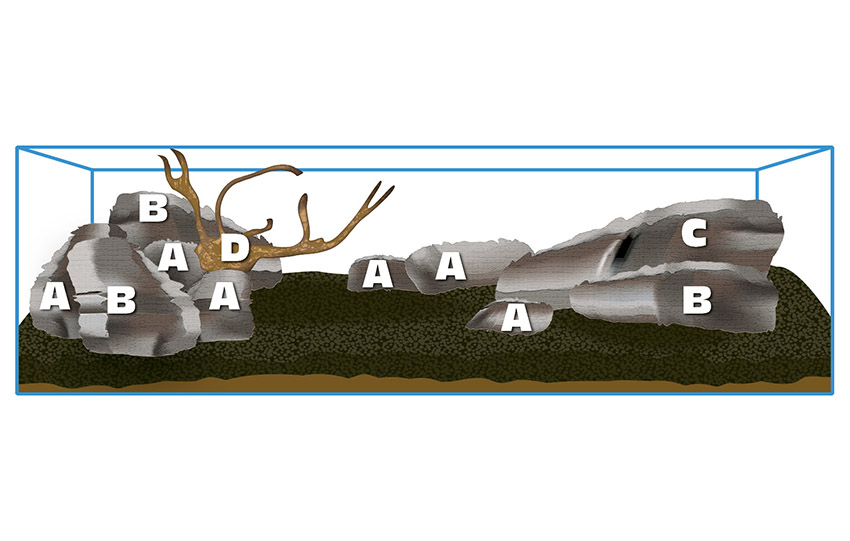
- 1 x sera Scaper Root L
- 1 x sera floredepot 2.4 kg (5.3 lb.)
- 1 x sera floredepot 4.7 kg (10.4 lb.)
- 1 x sera Gravel Anthracite 13 l
These products allow creating an impressive and varied landscape in only four steps:
1. Add nutrient soil
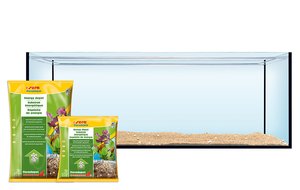
The sera floredepot nutrient soil is the basis for optimal plant growth and must not be missing in the Shrimp XXL hardscape. It is distributed in a layer approximately 2 – 3 cm (0.8 – 1.2 in.) thick in the entire aquarium. For not disturbing the final appearance of the underwater landscape, we recommend hiding the nutrient soil behind the ornamental bottom ground along the aquarium glass.
2. Add ornamental bottom ground
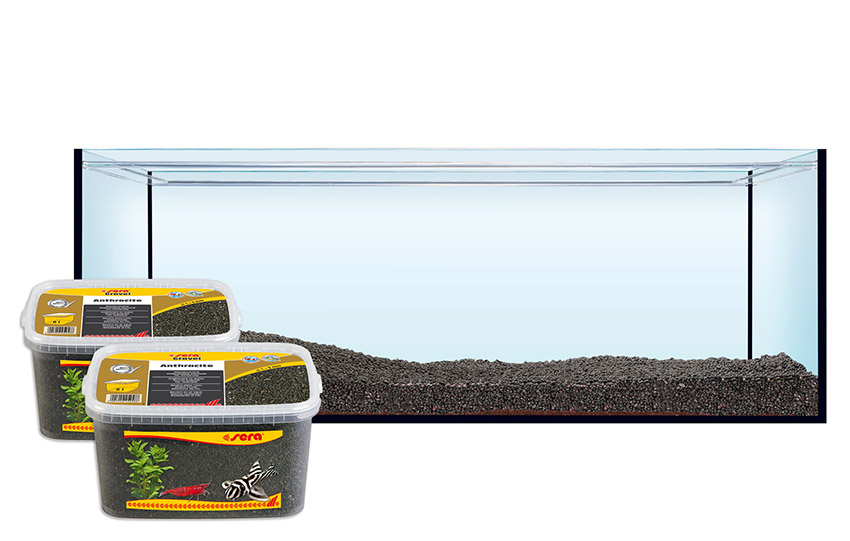
sera Gravel Anthracite is an anthracite colored natural gravel. For the Shrimp XXL hardscape, the gravel is placed in the aquarium in a layer 4 – 5 cm (1.6 – 2 in.) high. Let the gravel get slightly higher towards the sides and the back. This creates the impression of a valley, and additional depth is being created, which lets the tank appear bigger.
3. Place rocks and roots
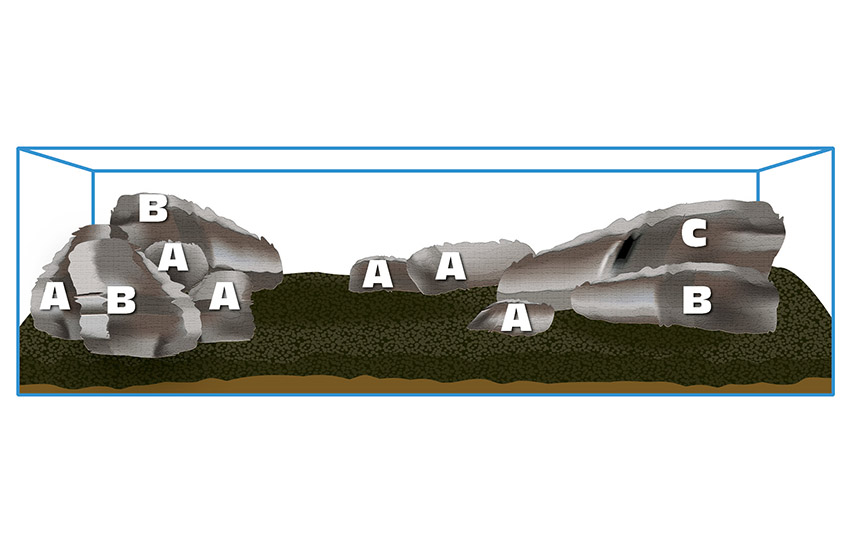
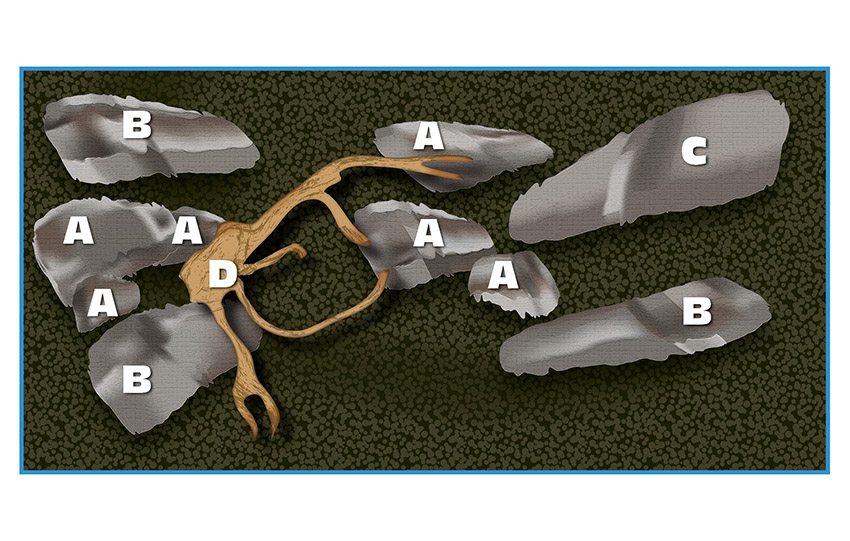
Depending on the shape of the XXL rock and your personal taste, this is placed on the right side of the tank in the front or back area. If it is in the front area, a size L rock is placed vertically behind it. If it is in the back area, a size L rock is placed horizontally and in front of it according to the sketch. In the middle area, 3 slightly offset smaller rocks loom out of the bottom like ground rock. The remaining rocks are placed in the left area behind and also on top of each other. They thus form a big rock with smaller hiding opportunities. The rocks should be well connected to each other as to prevent them from sliding. Finally, the root is “anchored” in this rock. The rocks prevent the root from floating. This allows integrating them after short cleansing, and watering is not required. At the same time, there are additional design opportunities.
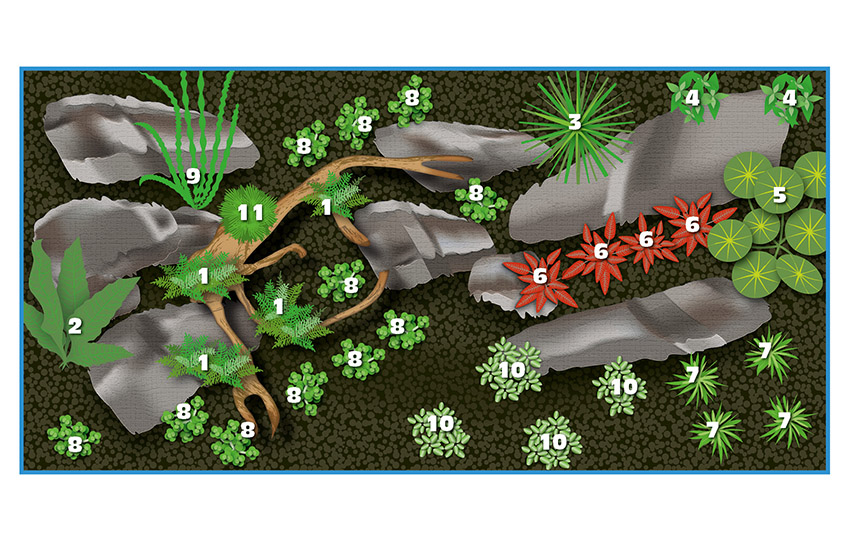
A = sera Rock Gray Mountain S/M, B = sera Rock Gray Mountain L, C = sera Rock Gray Mountain XXL
The following plants have been used in this setup example:
1. Vesicularia ferriei “Weeping Moss”
2. Microsorum pteropus
3. Blyxa japonica
4. Staurogyne sp.”Bihar”
5. Hydrocotyle verticillata
6. Alternanthera reineckii “Mini”
7. Lilaeopsis novae zelandiae
8. Micranthemum umbrosum
9. Crinum calamistratum
10. Glossostigma elatinoides
11. Fissidens fontanus
Most of the plants are planted into the bottom ground according to the planting layout. Vesicularia ferriei (1.) is placed on the root, Microsorum pteropus (2.) on the rocks. They can be glued or bound to the rock either with suitable glue or fishing line.
Gently press a hole into the gravel with the fingers, or push it aside, for the bigger plants. Make sure the nutrient soil does not mix with the bottom ground and gets to the surface while doing so. The roots of the plants can be shortened to 2 cm (0.8 in.) if required, e.g. for planting them more easily. In case of smaller plants such as bottom covering plants, we recommend cleaving the plant carefully and without damaging single stems, and to plant them in smaller bushes with some distance to each other. This is best done with tweezers.
Tip: Before adding fish, it is worthwhile with new AquaTanks setups to wait until the plants have grown on and cannot be pulled out by the fish anymore.